Once upon a time, in the picturesque city of Napoli, Italy, there was a little pizzeria nestled amidst the cobblestone streets. It was owned by a warm-hearted man named Ciro, affectionately known as Zio Ciro, which means “Uncle Ciro” in Italian. Zio Ciro had a passion for pizza that ran through his veins, a passion that had been passed down through generations of his family.
From a young age, Zio Ciro learned the art of pizza-making from his Nonna Rosa, who had her own secret recipe for the most delectable pizza dough. Zio Ciro spent countless hours in the family kitchen, kneading the dough and perfecting the art of creating the perfect pizza base.
As he grew older, Zio Ciro’s love for pizza only intensified. He experimented with various toppings and flavours, using only the freshest ingredients he could find in the local markets. His pizzas became renowned throughout Napoli, drawing locals and tourists alike to his little pizzeria.
Word of Zio Ciro’s delicious pizzas began to spread far beyond the borders of Napoli. Food critics from around the world praised his creations, and soon, his pizzeria became a must-visit destination for pizza enthusiasts from every corner of the globe.
One day, a renowned chef from New York City visited Napoli and stumbled upon Zio Ciro’s pizzeria.
He was spellbound after taking a single bite of Zio Ciro’s Margherita pizza. The flavours danced on his taste buds, and he knew he had discovered something extraordinary.
The New York chef approached Zio Ciro, brimming with enthusiasm. He proposed an idea that would change Zio Ciro’s life forever – to open a pizzeria together in the heart of New York City. It would be an opportunity for Zio Ciro to share his authentic Neapolitan pizzas with a broader audience.
Excited by the prospect of sharing his love for pizza with the world, Zio Ciro agreed to the partnership. With Nonna Rosa’s blessings and her secret pizza dough recipe tightly secured, Zio Ciro set foot on American soil for the first time.
Their pizzeria in New York City became an instant success. Lines stretched around the block, and food critics raved about the magic of Zio Ciro’s pizzas. The heart and soul of Napoli were infused into every pizza they served, and people could taste the passion and dedication in every bite.
Zio Ciro’s fame spread like wildfire, and soon, he was invited to international pizza competitions. He competed against renowned chefs from Italy and beyond, and to everyone’s astonishment, Zio Ciro emerged victorious time and time again.
His journey from a small pizzeria in Napoli to conquering the world with his delicious pizzas was nothing short of a fairy tale. Yet, throughout his success, Zio Ciro remained humble and true to his roots. He never forgot the warmth of his little pizzeria in Napoli and the lessons he learned from Nonna Rosa.
To this day, Zio Ciro’s legacy lives on, not only in the hearts of pizza enthusiasts worldwide but also in a line of authentic Italian pizza ovens. Tek Ref, a renowned manufacturer of top-quality kitchen appliances, decided to honour Zio Ciro’s memory by creating a special line of pizza ovens named after him.
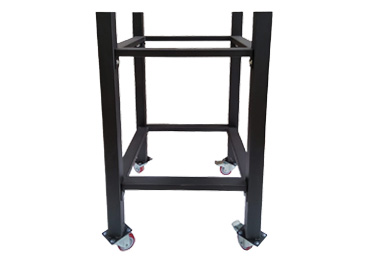
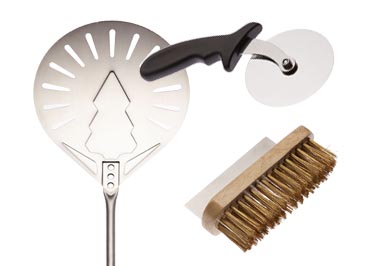
The Zio Ciro Pizza Ovens are a tribute to the passion and dedication that Zio Ciro poured into his craft. Each oven is designed with the same attention to detail and authenticity that Zio Ciro brought to his beloved pizzas. From the precise temperature control to the use of the finest materials, these ovens carry the essence of Napoli’s pizza-making tradition.
The Zio Ciro Pizza Ovens became an instant hit among home cooks, professional chefs, and pizzerias alike. Just like Zio Ciro’s pizzas, these ovens have the power to transport anyone to the heart of Napoli with every pizza they bake.
Tek Ref proudly carries the legacy of Zio Ciro, the Italian pizza chef who conquered the world with his delicious pizzas. Through the Zio Ciro Pizza Ovens, his spirit lives on, inspiring countless pizza enthusiasts to create their own authentic Italian masterpieces.
And so, the legend of Zio Ciro continues to flourish, not only in the memories of those who tasted his pizzas but also in the hearts of all who use the Zio Ciro Pizza Ovens to bring a slice of Napoli’s magic into their homes and businesses.